Silvercrest STG 70 B2 User Manual Page 6
- Page / 62
- Table of contents
- BOOKMARKS
- )UHH]HU67*% 1
- ID: STG 70 B2_11_V1.7 2
- Prehad / Übersicht 3
- Contents 4
- Overview 4
- 1. Safety instructions 4
- 2. Items supplied 5
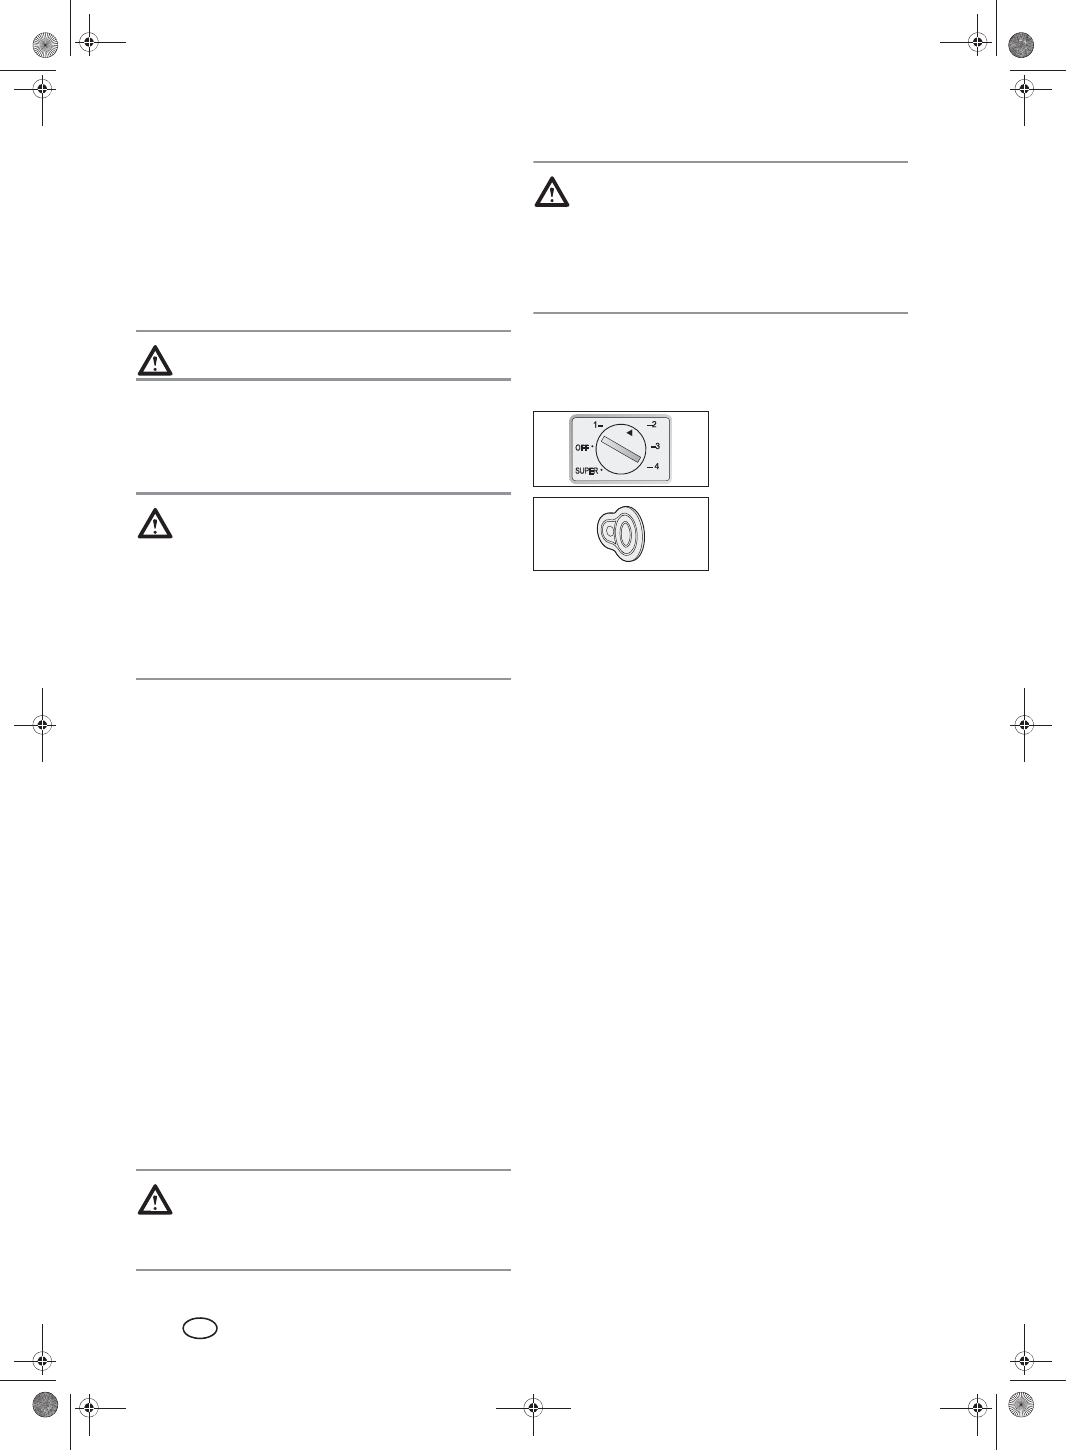
- 4. Using for the first time 6
- 5. Operation 6
- 6. Saving energy 7
- 8. Defrosting and cleaning 8
- 10. Troubleshooting 10
- 11. Technical data 10
- 12. Disposal 11
- 13. Warranty 11
- Spis treci 12
- Przegld 12
- 1. Wskazówki bezpieczestwa 12
- 3. Transport 14
- 4. Uruchomienie 14
- 5. Obsuga 14
- 2. Zakres dostawy 14
- 6. Oszczdzanie energii 15
- 8. Rozmraanie i czyszczenie 16
- Potrzebne bd: 17
- Kolejno czynnoci 17
- 10. Rozwizywanie problemów 18
- 11. Dane techniczne 19
- 12. Utylizacja 19
- 13. Gwarancja 19
- Tartalom 20
- Áttekintés 20
- 1. Biztonsági utasítások 20
- 2. A csomag tartalma 21
- 3. Szállítás 22
- 4. Üzembevétel 22
- 5. Használat 22
- 6. Energiatakarékosság 23
- 7. Minden a mélyhtésrl 23
- 8. Leolvasztás és tisztítás 24
- 9. Az ajtóvasalat cseréje 24
- 10. Problémamegoldás 26
- 11. Mszaki adatok 27
- 12. Eltávolítás 27
- 13. Garancia 27
- 1. Varnostni napotki 28
- 2. Obseg dobave 29
- 3. Prevoz 29
- 4. Prietek uporabe 29
- 5. Upravljanje 30
- 6. Varevanje z energijo 31
- 7. Vse o zamrzovanju 31
- 8. Odmrzovanje in išenje 32
- 9. Menjava vratnega teaja 32
- 10. Odpravljanje težav 34
- 11. Tehnini podatki 34
- 13. Garancija 35
- 1. Bezpenostní pokyny 36
- 2. Rozsah dodávky 37
- 3. Peprava 37
- 4. Uvedení do provozu 37
- 5. Obsluha 38
- 6. Úspora energie 39
- 7. Na téma zmrazování 39
- 8. Odmrazení a ištní 40
- 10. ešení problém 42
- 11. Technické parametry 42
- 12. Likvidace 42
- 13. Záruka 43
- 1. Bezpenostné pokyny 44
- 3. Preprava 45
- 4. Uvedenie do prevádzky 46
- 8. Odmrazovanie a istenie 48
- 9. Zmena otvárania dverí 48
- 10. Riešenia problémov 50
- 11. Technické údaje 50
- 12. Likvidácia 50
- Übersicht 52
- 1. Sicherheitshinweise 52
- 2. Lieferumfang 53
- 4. Inbetriebnahme 54
- 5. Bedienung 54
- 6. Energie sparen 55
- 7. Rund ums Tiefkühlen 55
- 8. Abtauen und Reinigen 56
- 9. Türanschlag wechseln 56
- 10. Problemlösungen 58
- 11. Technische Daten 59
- 12. Entsorgen 59
- 13. Garantie 59
- 67*%B Ɇ,$1B 62
- ,$1 62
- +R\HU+DQGHO*PE+ 62
- .¾KQHK¸IH 62
- '+DPEXUJ 62
Related products and manuals for Refrigerators Silvercrest STG 70 B2


 (38 pages)
 (14 pages)


© 2020, manymanuals.com. All rights reserved. | 1.181 s |
 Manymanuals.com
 Manymanuals.de
 Manymanuals.fr
 Manymanuals.it
 Manymanuals.pl
 Manymanuals.cz
 Manymanuals.es
 Manymanuals-pt.com
Comments to this Manuals