Silvercrest SSR 1080 B2 Specifications Page 14
- Page / 72
- Table of contents
- TROUBLESHOOTING
- BOOKMARKS
- Table of Contents 4
- 3 - English 5
- English - 4 6
- Introduction 7
- Intended Use 7
- Package Contents 7
- Technical Specifications 7
- Safety Instructions 8
- Operating Environment 8
- Overview 10
- Controls and buttons 10
- Connectors and Sockets 10
- Remote control 11
- Before You Start 12
- HDMI Jack 13
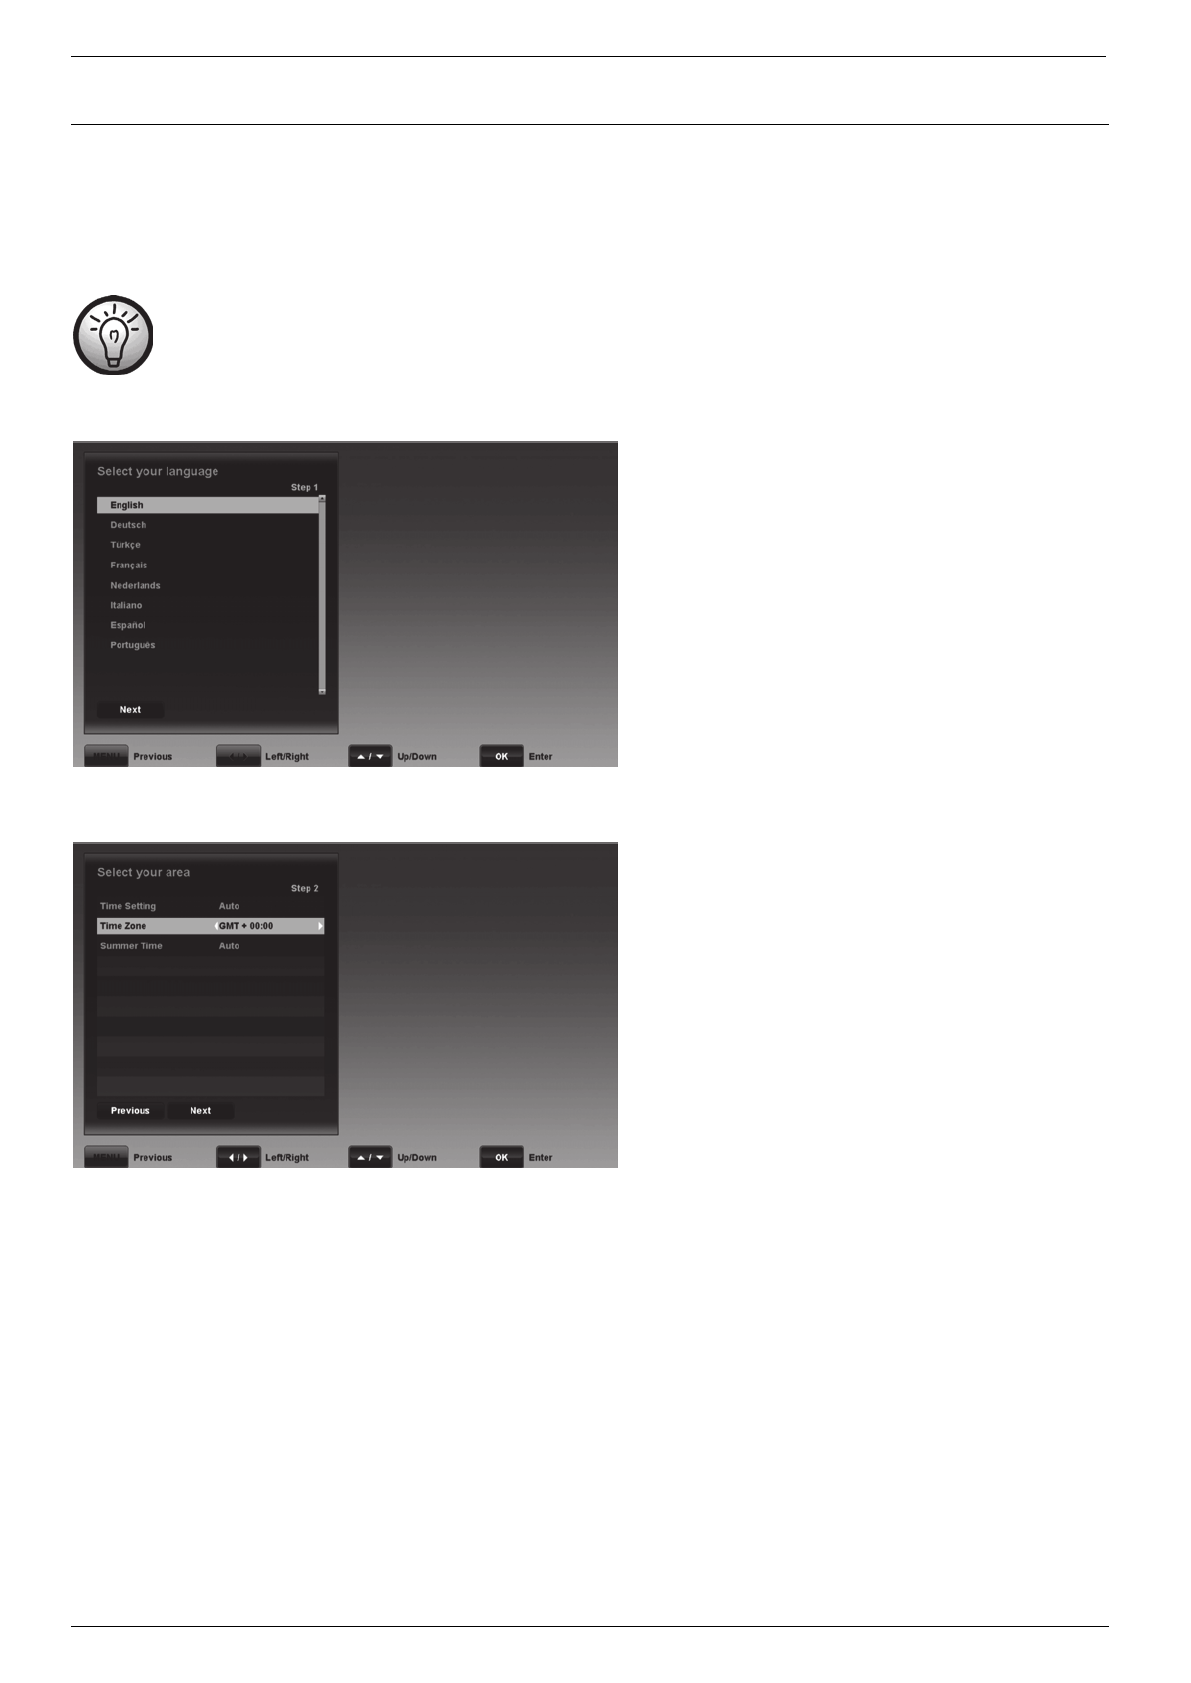
- Getting Started 14
- Selecting the Menu Language 14
- Time Setting 14
- Channel List 15
- OSD Menu 16
- Edit Channels 16
- Edit Favorite Channels 18
- Installation 19
- TVOnly 20
- Manual search satellite 21
- TP Search 24
- User Setup 25
- Parental Control 26
- A/V Control 27
- OSD Setting 28
- Automatic Power Down 28
- Common Interface 29
- Information 30
- Default Setting 30
- Transponder 31
- Auto OTA 31
- Auto OTA Time 31
- Everyday Use 32
- Operation 33
- Programme Information 34
- Selecting Audio Channels 34
- Adjusting the Volume 34
- Selecting Channels 34
- Displaying Subtitles 35
- Teletext 35
- Sleep Timer 35
- Troubleshooting 35
- Maintenance / Cleaning 36
- Environment and Recycling 36
- Conformity notes 36
- Inhaltsverzeichnis 38
- Sat-Receiver SSR 1080 B2 39
- 37 - Deutsch 39
- Deutsch - 38 40
- Einleitung 41
- Bestimmungsgemäße Verwendung 41
- Lieferumfang 41
- Technische Daten 41
- Sicherheitshinweise 42
- Betriebsumgebung 42
- Übersicht 44
- Bedienelemente 44
- Anschlüsse 44
- Fernbedienung 45
- Vor der Inbetriebnahme 46
- Den Sat-Receiver anschließen 47
- Inbetriebnahme 48
- Menüsprache auswählen 48
- Zeiteinstellungen 48
- Senderliste 49
- Das OSD-Menü 50
- Sender bearbeiten 50
- Favoritensender bearbeiten 52
- Manuelle Suche Satellit 55
- TP bearbeiten 58
- Löschen 58
- TP Suche 58
- Benutzereinstellungen 59
- Uhrzeit Einstellung 60
- Kindersicherung 60
- AV Einstellungen 61
- OSD Einstellung 62
- Werkseinstellung 64
- Automatisches Softwareupdate 65
- Der tägliche Gebrauch 66
- Die Bedienung 67
- Programminformationen 68
- Tonkanäle auswählen 68
- Lautstärke einstellen 68
- Senderwahl 68
- Untertitel anzeigen 69
- Automatische Abschaltung 69
- Fehlerbehebung 69
- Wartung / Reinigung 70
- Konformitätsvermerke 70
© 2020, manymanuals.com. All rights reserved. | 1.603 s |
 Manymanuals.com
 Manymanuals.de
 Manymanuals.fr
 Manymanuals.it
 Manymanuals.pl
 Manymanuals.cz
 Manymanuals.es
 Manymanuals-pt.com
Comments to this Manuals